Monday, October 23, 2017

DIY Rainier Flannel

While getting prepared for #Rday, we knew we needed something different to rep our Rainier Beer gear. One of my girlfriend suggested we do some creative work with our Rainier outfits.

We decided to get some buffalo plaid shirts from Costco. They are pretty thick which kept us so warm for our outdoor event! We were inspired by a flannel we saw at a country concert earlier in the summer, so we knew we wanted to add a Rainier R on the back and do some bleach action. There are three ladies on our team of 6, so we wanted the same thing but with our own spin on it.

First we prepared our bleach; 3 parts water to 1 part bleach. We put our washed flannels in the pot to bleach. I couldn't tell you how long they were in there because we were distracted with our pinot.


After they soaked for about 1/3 of the time, we did add the sleeves in to make the cuffs bleached too. When the flannels reached our desired color, we removed the flannels in the bath tub and rinsed thoroughly. We tossed them in the wash on a quick cycle, waited in the hot tub, and then dried them.

I had already made the Rainier R stickers with my Cameo Silhouette to stick on the back. I figured this would ensure we get the correct shape of the R rather than a cardboard cut out, since the sticker would form to the shirt. I haven't experimented with iron on vinyl yet which would have made this much easier I am sure. I will save that for the next project... ;)

We stuck on the sticker and traced the R with white permanent fabric paint. We got 1 tube of white fabric paint with a fine tip, and one with no tip. The tip helped us paint the outline thinly to keep the shape accurate. After the outline dried for a few minutes, we ripped off the sticker and just painted inside the lines. We did a total of 4 coats on each shirt to get the thickness we wanted.


Kelsey is the fringe queen so she cut off a little bit from below the seam and went to town. She scraped the cut area until it was fringed the way we like it.

We debuted them at RDay in Seattle and it was a hit! Many people asked where we got them and we were proud to say we did it ourselves!


It poured, but Rainier provided us with some ponchos. Team RainDawgs played in the tournament but failed during round two. We will get em next year. ;)


Some more photos from my good friend Levi Hriczo took these model photos of me in my Rainier gear.


Tuesday, December 20, 2016

Your groomsman services are required

Almost ONE YEAR AGO Trevor and I got engaged on our Christmas family cruise. After he proposed, we went to the bar on the cruise ship and talked about what this means to us and how excited we were. We quickly decided that this would be out secret until the morning and we would surprise my parents at breakfast. We get back to our room (which we shared with my younger sister) and I catch Trevor giggling on his bunk bed. (Yes him and I slept on bunk beds the night we got engaged!) He immediately sent his best friend, who was deployed at the time, to tell him the news. It was such a sweet moment and Trevor was so excited to share our secret with his best friend. After we started talking about general details, we quickly talked about our bridal party. After all, we want our best and closest friends standing by our side!
When he decided on his guys, and what kind of gift he wants, I went to work.

Here is the final product for one of his groomsmen, Justin!


So I got these fun little glue dots to attach the cigars to the papers I made up for each of the guys. 


Final product! I used some brown construction paper and made the frame and name paper just with Microsoft Word. I glued that together and tied a little bow around the whole thing and called it good!


Saturday, February 6, 2016

Will you...be my bridesmaid?

Once I got engaged, I couldn't wait to start planning. Anyone who knows me, knows that I am a planner and love coordinating events. Trevor popped the question December 25 in the waters of Grand Cayman and I kept the secret for 8 days before telling everyone!
Once we shared our wonderful news, the questions start rolling in. "When?" "Where?" "Who will be in the wedding party?"
So of course the next step for me is to choose my gals. Once my bridesmaids were chosen, I got to work on how I would "pop the question."

I LOVE crafting, so this was an exciting project for me to make. Trevor and I decided on six guys and six gals to stand next to us and support us on the biggest celebration of our lives!

I started by finding these adorable photo boxes from Michaels, on sale for a whopping $2 each box. I got 5 of the brown with a red heart for my bridesmaids, and one white, black and gold for my MOH. I found the cutest little ornament frames from Michaels as well for $.50 each. Deals on deals. 

After leaving Michaels and only spending $16, I headed to Jo-Ann Fabrics next with my gift cards in hand, looking for the materials for inside the boxes!

At Jo-Anns I found:
-Mason Jar look-a-like drinking glasses
-Mini Glue Gun and Glue Sticks

Then a quick run to the store and I picked up the rest of my materials. Gum, nail polish, lipstick, and a mini champagne each!

Last thing I needed was the color scheme and my little blurb of info for the girls and TA-DA. There we have it. 


Wednesday, April 22, 2015

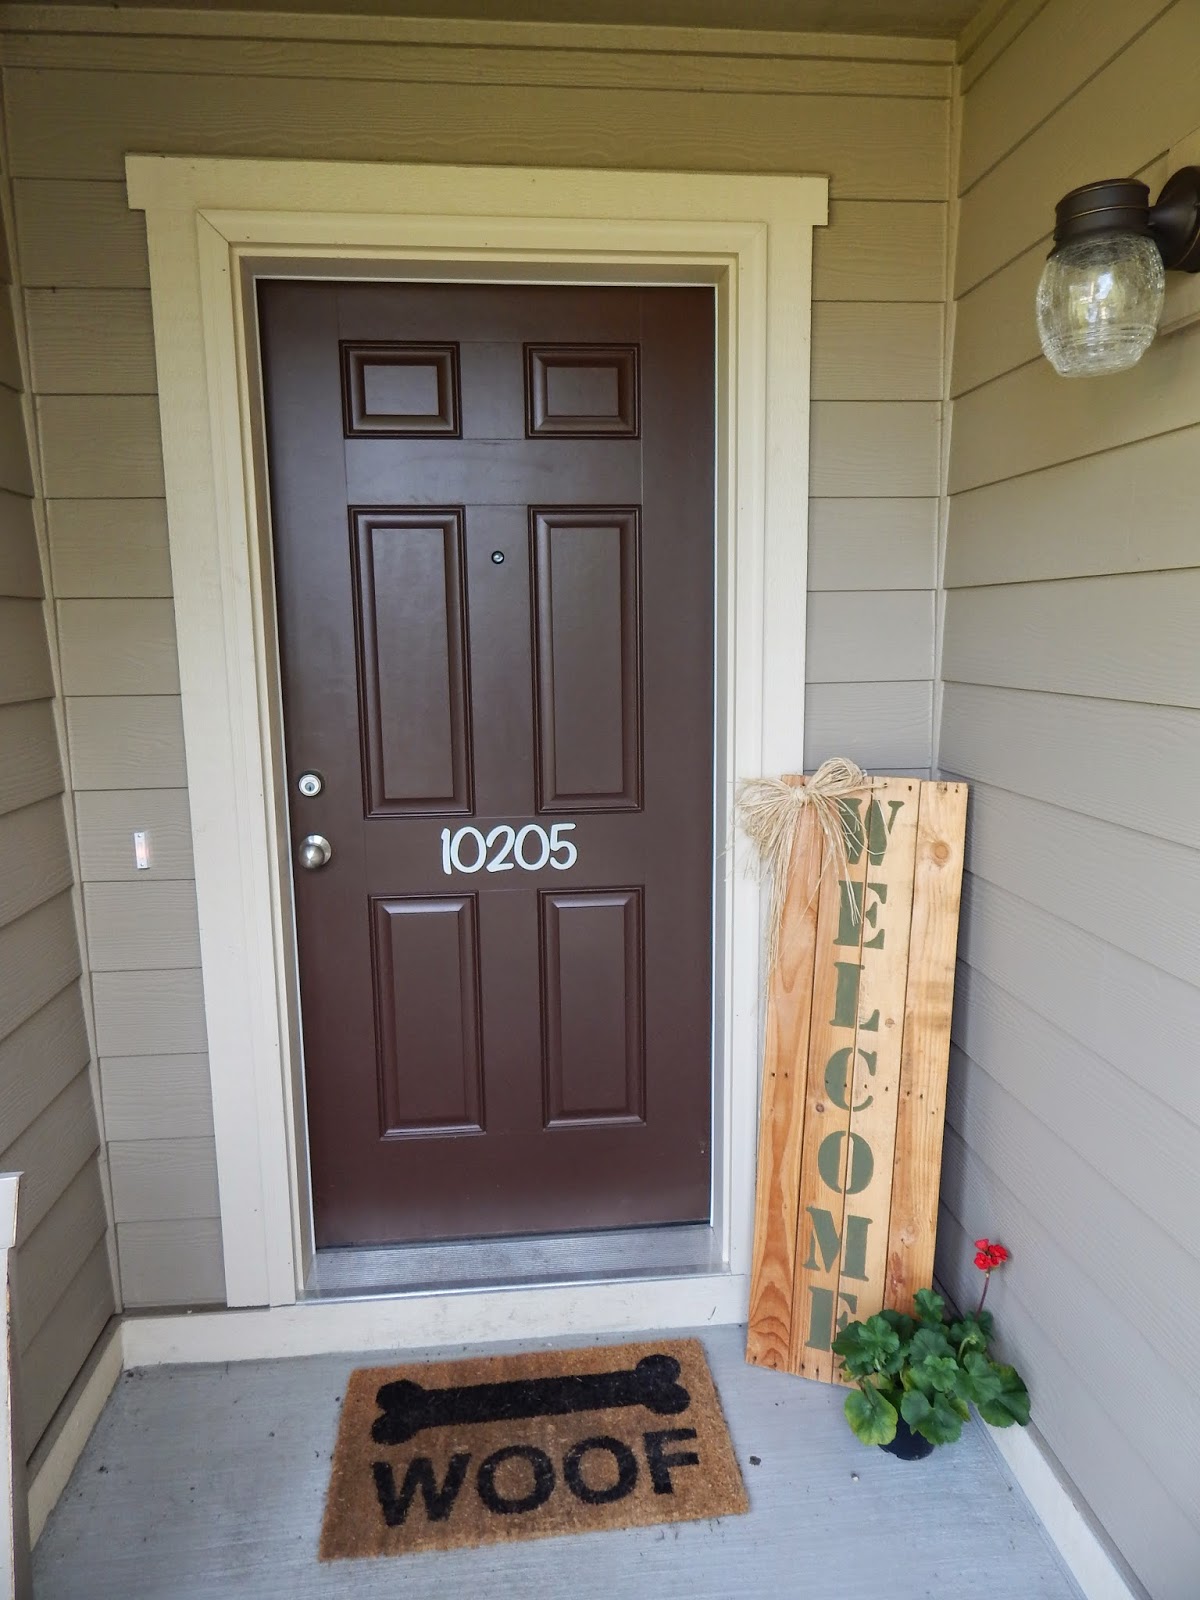
Front Door Pizaaz


<-- I just can't get over how stinkin' cute my front door is now.

I was browsing on Pinterest one night just thinking of ways to add some personality to my home... but I wanted something easy and fast! (I am not the most patient person when it comes to my crafts haha) I came across pins like this and this and just knew that this is what I was looking for. Luckily, I was spending my Sunday with one of my favorite craft ladies, Melissa, and it just so happens that she has a Cricket which made this craft even better.
All we needed was some patients and vinyl and TADA! I chose to not do "No. 10205" and just "10205" because it was 5 numbers and would be centered in the door. If my address was, lets just say, "4018" I would probably add the "No."
So if you're looking for something cute for your front door, here it is! Simple, cute, and best of all - EASY!

Before
After

Monday, March 16, 2015

DIY- Kitchen Chalkboard Wall

Welp, it's Monday, the start to a new week. And this week will be great because every morning when I have breakfast, I will be able to admire my newest craft, my Chalkboard Wall!This is my spin on Shanty-2-Chic's tutorial. You can find the original here.
Materials-
Chalkboard Paint (I prefer the can paint vs spray paint for this craft)
Paint Roller and Paint tray
Wood to make your frame (We purchased 2 1x4x8's)
Screws and Screwdriver or Drill
Stain
Polyurethane  (I prefer the spray can)
Staining Rag/pad, old towel
Chalk
Painters Tape


 Step 1- Get the Materials! I just wanted to add this photo because it was nice to have team effort on this project! 

Step 2- Disclaimer- We did this craft a little backwards. I started off my measuring the wall and eyeballing where I thought it would be a good fit. I decided it would be 4ft tall and 2.5 feet wide. While Trevor was building the frame, I was painting the wall! I just used a paint roller and poured some paint in my tray and went to town! After 30 minutes (I believe) I did another coat and in the end I did 3 or 4 coats. (The can will tell you how much time in between to wait for each coat!)


As you can see, I got a little carried away in the upper right hand corner and got some paint on the outside of the tape, but the frame is thicker than that, so it covered it. :) Phew!
Step 3-Another important step with any chalkboard crafts is after it has dried, to run over the entire surface with the side of the chalk. It acts as an activator and makes it easier to erase whatever you decide to draw or write on it. :)
Step 4- Time to stain! I chose the same stain that the ladies from Shanty-2-Chic used, and am SO happy I did! This brand dried in one hour and was so smooth to apply! And only one coat was needed. And in my kitchen, this color was VERY similar after it had dried! Yay!

Step 5- Let it dry the hour! Just leave it alone. :) While this dried, I was working on the chalkboard writing and what I wanted to put on there.

Step 6 - After the stain has dried, I did a few coats of Polyurethane to make it even more durable. I took it outside and sprayed the top half and let it dry for 30 minutes, then flipped it upside down and did the other half. The can says to allow 4 hours for it to completely dry before handling. It was hard, but we were able to wait. :)

Step 7- Trevor went to work on hanging the frame! He was a little creative with hanging and went from underneath and above so we didn't see the screws. There were two studs that we were able to attach the frame too as well, which was helpful.

Here is my handsome man checking his work.
I love the way it turned out! There was many ways to do this craft and I chose to build the frame as one and then attach it just in case we wanted to take it down, it would be a little easier. Our cousins did something very similar and when they built the frame, they just glued and nail-gunned it to the wall instead of building it then attaching it and it looks great as well! :) I think this was the perfect way to fill up the blank wall in our kitchen!